Monday, April 26, 2010

Rising Candle Pop-up


tip: use the print of the paper to express design elements. I could have used solid colors for this cupcake, then scored in the cupcake paper ridges, but why do that when striped paper can imply those ridges? The same point here can be made for the cupcake 'icing' paper choice.

Friday, April 23, 2010

Work in Progress: Woodburned Journal Cover


I've got these clock faces burned in, but still have to sand, paint the edges, and varnish before assembling the guest-book sized journal.

Monday, April 19, 2010

Upcycle your Plastic Packaging


A while back, I bought a stamp centering tool called a Stamp-a-ma-jig. It essentially is a mini t-square with a sheet of clear plastic, and it worked great! As time went on, the plastic sheet started to scratch and turn white, mostly from age and my washing the ink off after each use. You can buy replacement sheets of plastic, but why do that when you can just hit up your recycling bin?

I used the security packaging from printer cartridges. Whatever you use needs to be fairly thick. Using only your ***OLD*** blades and scissors cut out the flat part of the packaging into a rectangle. Voila! You're finished! And the best part: I don't wash my new upcycled sheets: I just make a sheet for every four stamps (You can put one stamp design in each corner), then file them away. Be organized, and put all your birthday designs together, then it's pretty easy to see which stamp will work best for the card you're creating.

Friday, April 16, 2010

Easel Backs


The only requirement for easel backed cards? They must fold flat! Here is a mini collection of different ways to do it. Double-click on the image for better viewing, as they are in a print friendly format.

Wednesday, April 14, 2010

Changes in Color


new larger flowers, assembled from smaller flower punches. The goal: to use up all my scraps!

Monday, April 12, 2010

Refillable!


I've been making these for a while (without the tray) and it's always bothered me to glue the pads in. With the tray, a new post-it pad can be popped in easily!

Sunday, April 11, 2010

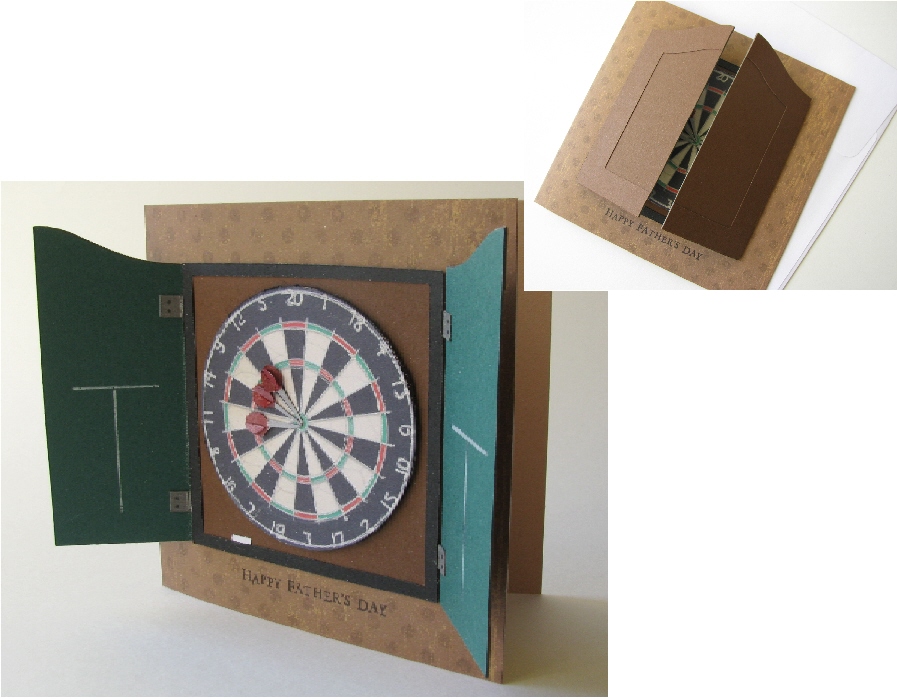
Points on Bull


The dartboard cabinet could be the card itself without any background, should you choose to make it larger. The board inside is 3" in diameter in this card.

Saturday, April 3, 2010

Happy Easter Everyone!


Our new indian runner ducks: named, of course, by my 15 year old daughter!

Thursday, April 1, 2010

Swinging Pendulum


Inside the grandfather clock, the pendulum swings freely.

Wednesday, March 31, 2010

Graduation Money Holder Card


Just another way to do the same design as the grad invites! This one holds a gift card, is larger, has no background (just the cap shape), and features sparkly paper and a braided tassle.

Monday, March 29, 2010

Grad Invites


A new design here for my son's graduation. He needs 80 of them, so I needed something that could be duplicated easily. Once the design was finalized, I created a clear plastic template. One down, 79 to go!

Friday, March 19, 2010

Flowerpot Accordian Card - Interchangeable Message


It's handy to have a card around that works for many occasions. This could be a get well, birthday, thinking of you, etc. The card on the floral pic is not glued in until right before you need it. What is really great about this one is that it is super easy, and a wonderful project for a beginner paper crafter.

Wednesday, March 17, 2010

Stained Glass for Easter - a Work in Progress


New design for me, and timewise, it's huge!The idea is to let light shine thru the 'stained glass'. There is a lot of intricate cutting, which actually was the easiest part! The hard part was adding the tissue paper color. Everything is protected with acetate. The Inside will get a vellum lining - I think! May change my mind on that... To be continued :)

Saturday, March 13, 2010

Born out of Necessity


I had this wonderful paper card file box for over 22 years, and it has finally bit the dust! So I designed one for me (and one for etsy), with all the features I'd like to see a card box that has to sit out on display. Mine is made of fabric and chipboard, with glued and machine sewn joints. The trim is sewn on, not glued, and the measurements are based on the biggest envelopes I have. I made 8 dividers for the inside, out of poster board.